- Images in Markdown
- How to insert images in Typora
- When insert images…
- Preferred Image Syntax
- Display images in relative path
- Upload images to cloud server
- Delete Image
- Rename / Move / Copy Image
- Align images
- Resize images
Images in Markdown
Since a Markdown file is a plain text file, you cannot insert image data into Markdown file directly, but instead insert references to image files.
In Markdown, images are written like . The src here can either be a URL like https://octodex.github.com/images/yaktocat.png, or an absolute/relative file path, like ../images/test.png.
How to insert images in Typora
Typora supports a number of different ways of doing this.
Write the Markdown
You can simply write the markdown syntax to insert the image. Or click “image” from the menu bar, or press the shortcut key. If there is an image URL in clipboard, then the URL will be inserted into the src part directly.
Drag & Drop
There’s also an easier way — drag and drop, like the screencast below.
You can also drag and drop multiple image files in one go.
Select from local files
If you select the menu item Format → Image → Insert Local Images… from menu bar to open a dialog to select and insert local image(s).
If you use this menu item frequently, we suggest you re-assign the shortcut key for this “insert image” command following Custom Key Binding.
Paste images from clipboard
Typora supports paste image data from clipboard, after telling typora where to put those images. Typora would put image data into given folder or server, then insert images referring to that stored file or URL. Please refer to section When insert local image… for more detail.
Tips: on macOS, users can copy image file from finder and then paste into typora. It has same behavior with drag and drop.
Tips: on macOS, you can also copy images from iPhone and then paste into Typora after setup the location to put image files.
When insert images…
Typora supports copying image files into a given folder or web server when inserting local images using drag and drop, or from the menu. The instructions for how to set it up follows.
Default behaviors
By default, when you insert or drag and drop an image file into Typora, we will use the path of image file for attribute src.
Copy image files to target folder when inserting local image
To use this feature, you need to opt-in the option Allow copy images to given folder in the preferences panel.
One common scenario is to use Typora to edit *.md posts for static websites (like Jekyll). For example, if the .*md file is put under _posts folder while the image files goes into _media folder, you may want to copy images files into the folder _media when you drag and drop or paste images into Markdown file automatically. Here’s how:
-
Save your file into a given folder.
-
Enable
Editor→Image Insert→Allow copy images to given folderin preferences panel.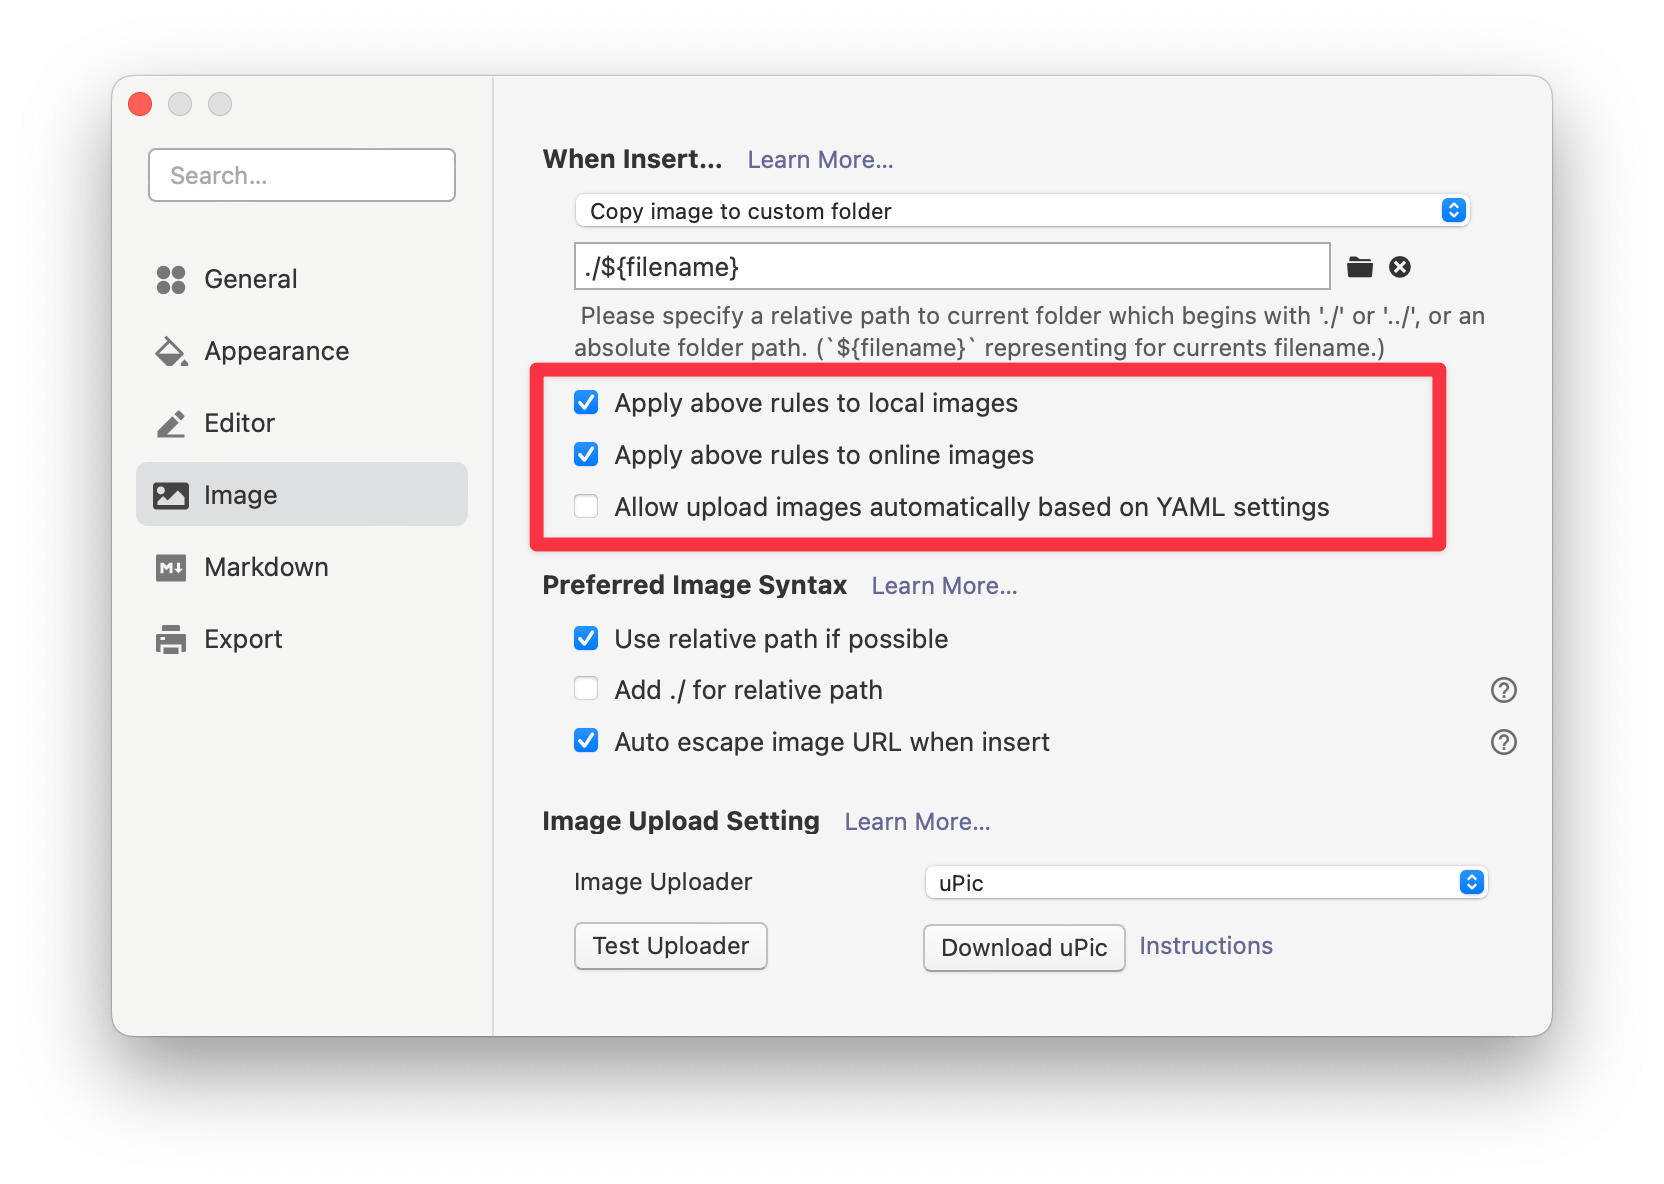
-
Select
Format→Image→When Insert Local Images→Copy Image File to Folderfrom the menu bar, and pick the target folder.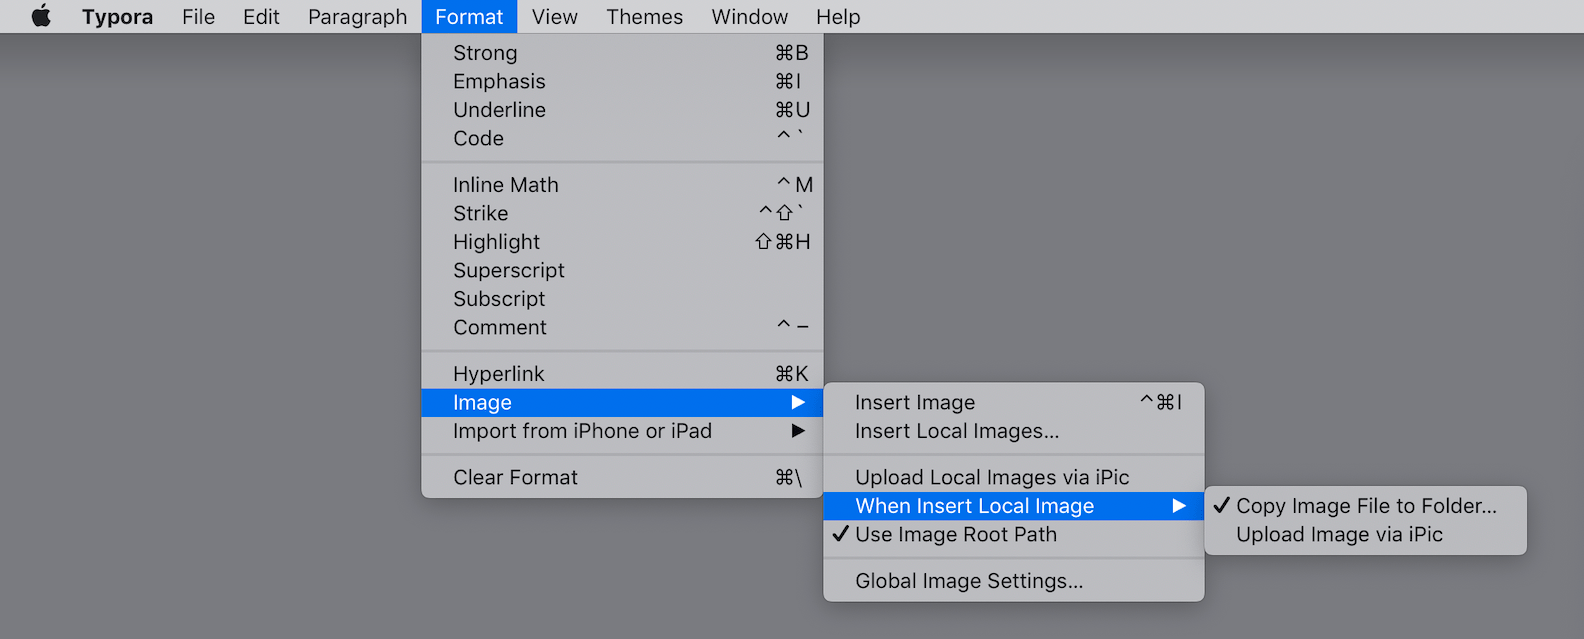
In step 3, a new item typora-copy-images-to: {relative path} will be inserted into the YAML Front Matter block of the current document. So you can also manually add typora-copy-images-to property in YAML Front Matter to enable this behavior.
After that, if you drag and drop local images or paste images into Typora, the image file will be copied into the target file and update the related src.
Upload image file to web server.
Please refer Upload Automatically When Insert Images.
Use global setting for image insert operations
You can tell Typora where to copy images or upload images when inserting images for all documents (global setting). You can find the images under “image” section in preferences panel.
Preferred Image Syntax
You can find following options to config which pattern of markdown source will be generated when insert images.
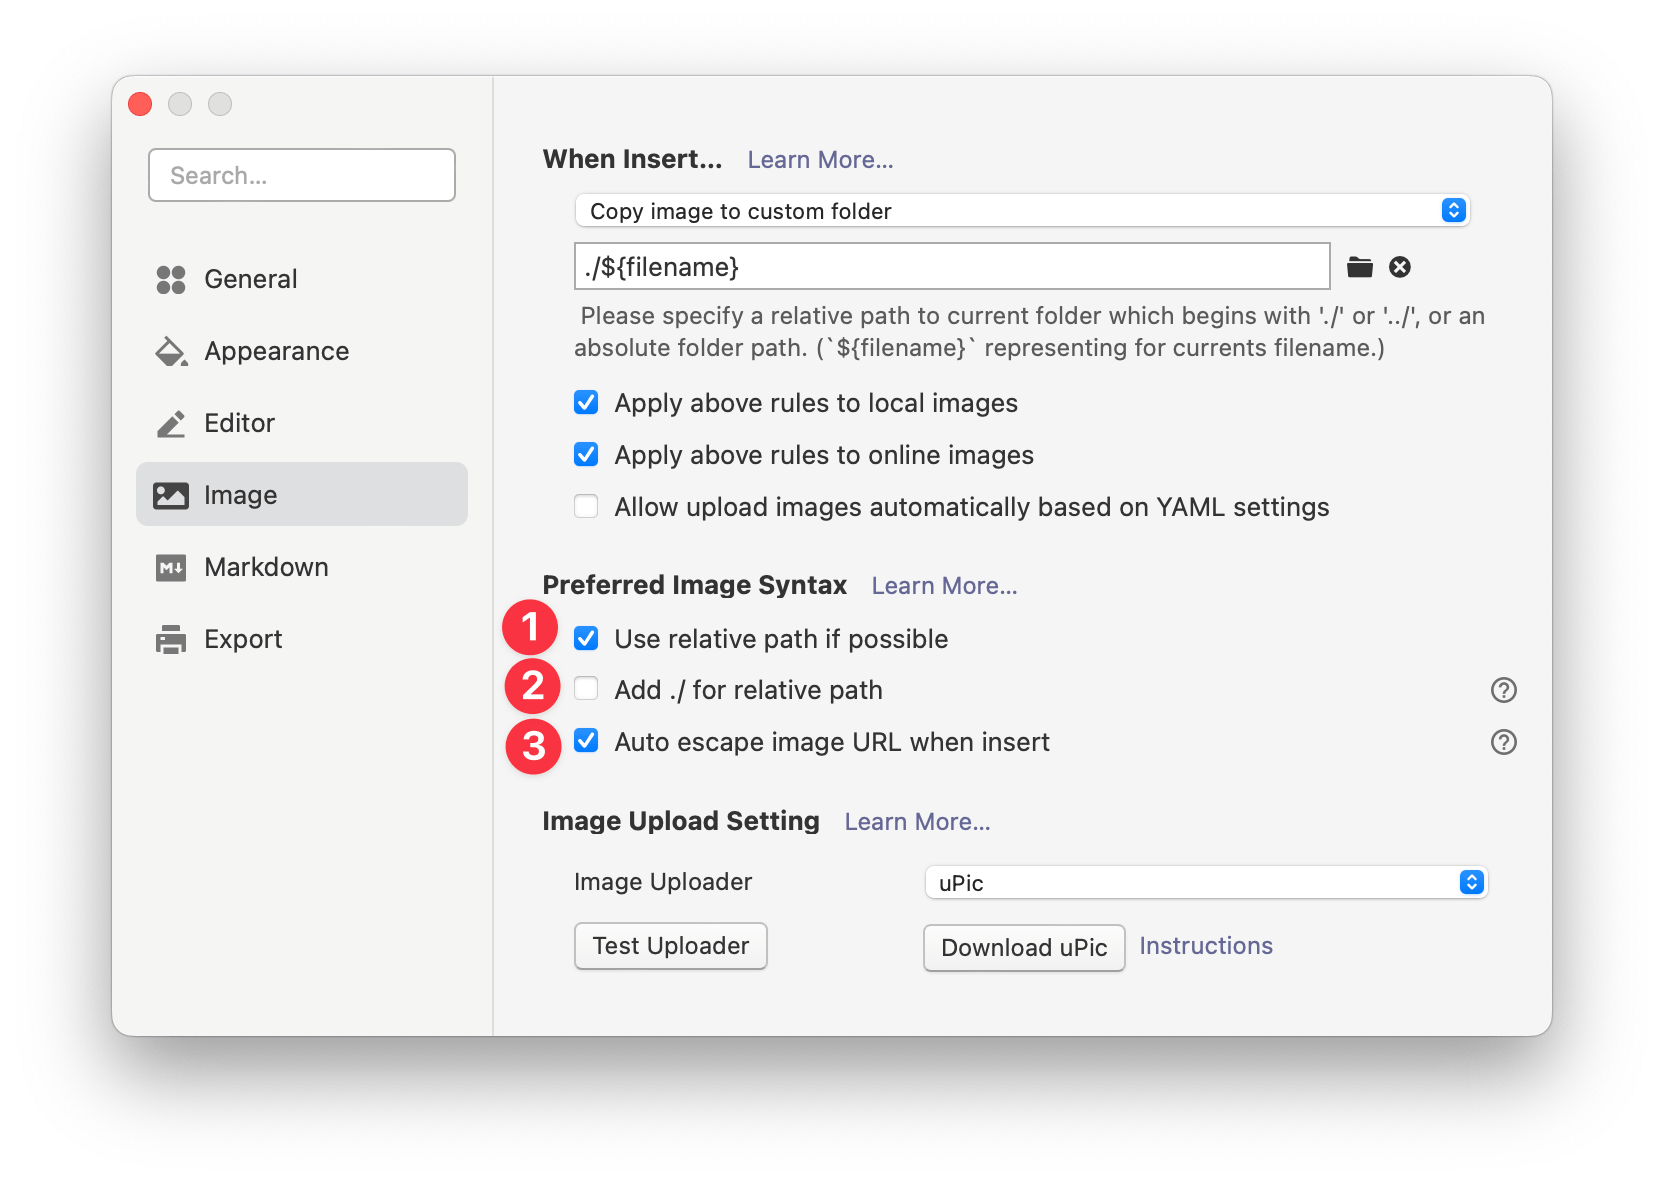
Use Relative Path
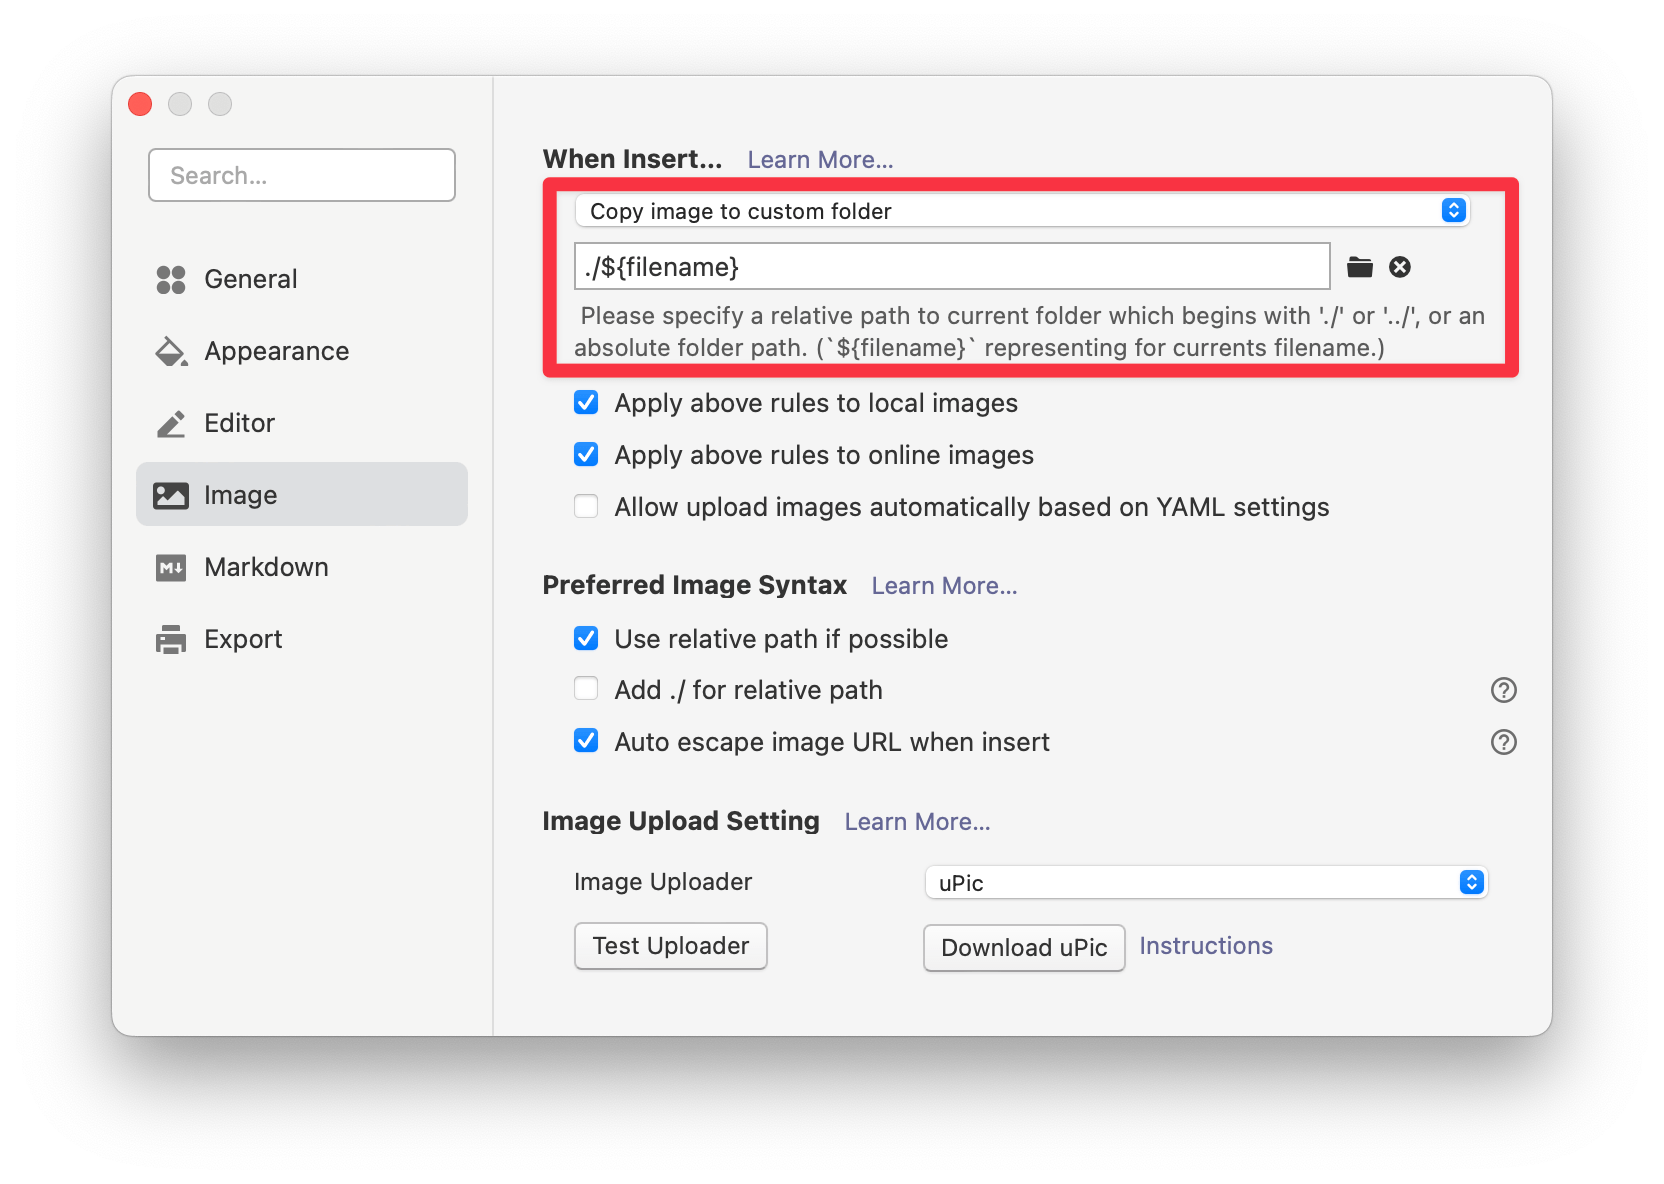
If you enable Editor → Image Insert → Use relative path if possible (checkbox No.1 in screenshot) in the preferences panel, and your work has been saved into a file, then when you drag and drop a local image, the src attribute will be set as a relative path to current file (folder).
Ensure ./ Prefix for Relative Path
You can enable this options (checkbox No.2 in screenshot) to ensure ./ prefix of the relative path when drop or insert images. This will improve compatibility with some 3rd markdown engines, like VuePress, but may introduce incompatibility with other markdown tools. So we recommend to disable it.
Use Escaped Path
Both links and image sources (src) support original unescaped path for better readability, for example  can be read by Typora successfully if image file exists in that path. However, some markdown engine or browser does not support unescaped path. By enabling Editor → Image Insert → Auto escape image URL when insert (checkbox No.3 in screenshot) in preferences panel, the path will be converted into escaped ones: .
Display images in relative path
Relative path to current file/folder (default behavior)
By default, users can refer to local image by relative path to the current *.md file. For example, if the *.md file is at /User/typora/desktop/test.md, then the  will display image from /User/typora/desktop/image.png just like the <img> tag in HTML. Also, for ../download/image.png, image from /User/typora/download/image.png will be fetched.
Relative path to certain folder
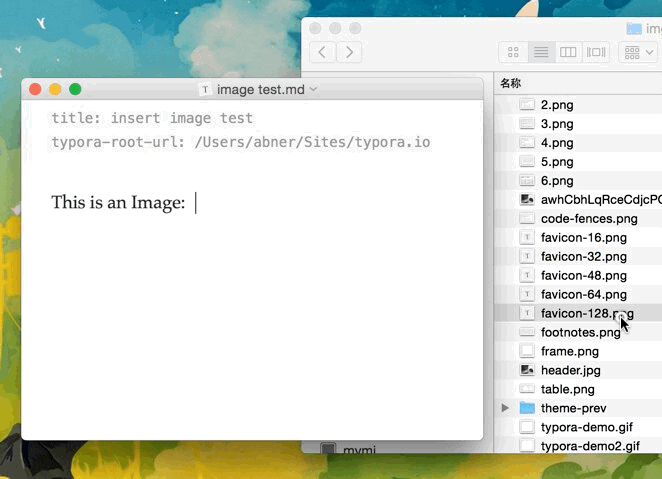
If you’re using markdown for building websites, you may specify a URL prefix for image preview on the local computer with property typora-root-url in the YAML Front Matter.
For example, write typora-root-url:/User/Abner/Website/typora.io/ in YAML Front Matters, and then  will be treated as  in typora.
In more recent versions of Typora, instead of manually typing typora-root-url property, you can just click item from the menu bar Format → Image → Use Image Root Path to tell Typora to generate typora-root-url property automatically.
Upload images to cloud server
Typora supports to upload image to a cloud image server.
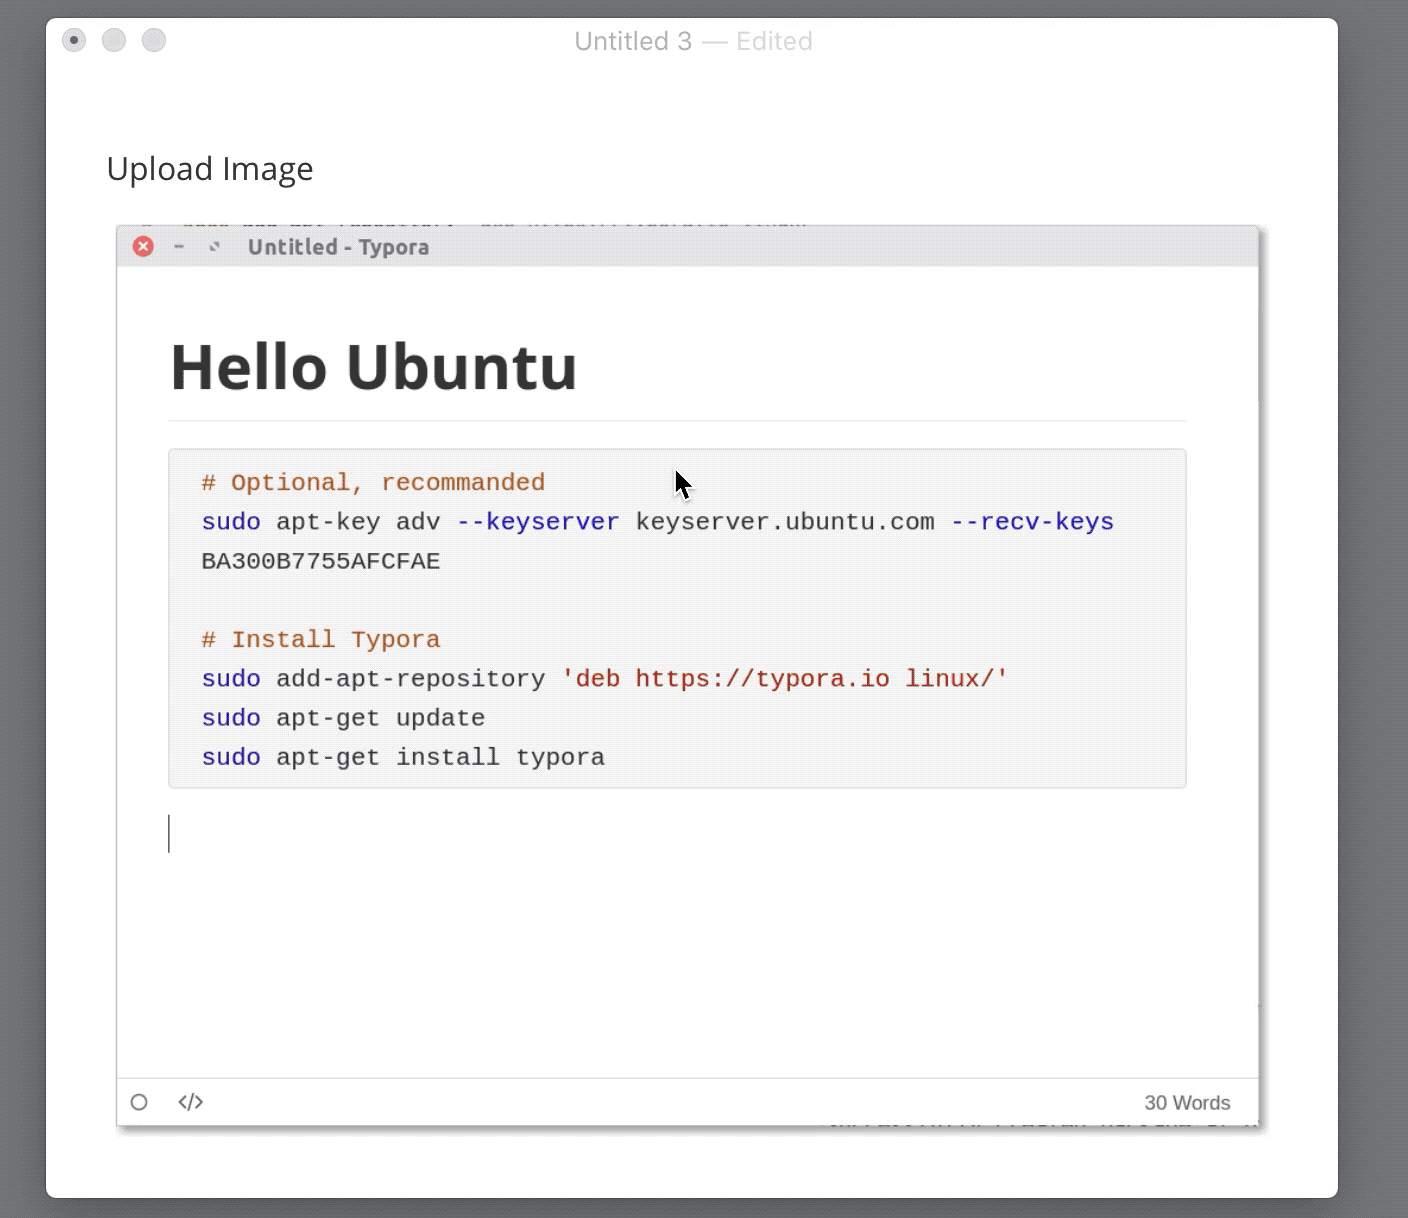
Please refer Upload Image.
Note: If a crash happens when uploading images via iPic, please re-download typora from typora.io.
Upload all local images to cloud server
Please refer Upload All Local Images
Upload when inserting images
How-tos for this part can be found in section When insert local image… → Upload image file to web server.
Delete Image
You can right click on an image and click Delete Image from context menu to remove the image and its original file on disk.
If you just want to remove the image reference but want to keep the original image file, you can just select and delete the markdown code for image.
Rename / Move / Copy Image
After you insert image files into a Markdown document, you can see its original path in the markdown source code. If you want to update the image path, you can click Move Image to or Copy Image to item from context menu.
Move Image
Move Image to will move the image file to target folder, and update path references in your markdown file. You can also give the image file a new file name in this operation (rename image).
Rename Image
You can Rename Image via the Move Image command in context menu.
Copy Image
Copy Image to will copy the image file (and keep the original file) to target folder, and update path references in your markdown file.
Move All Images
(Requires Typora ≥ 1.3) Click Format → Image → Move All Images to from menubar to move all used images to new folder and update path references in your markdown file. If your image is remote images, then Typora will download and save them to the target folder.
Copy All Images
(Requires Typora ≥ 1.3) Click Format → Image → Copy All Images to from menubar to copy all used images to new folder and update path references in your markdown file. If your image is remote images, then Typora will download and save them to the target folder.
Download All Images
You can use either Move All Images to or Copy All Images to mentioned above to download image files from remote server and update your image reference with local one.
Align images
Currently Typora does not support image alignment. But you can use HTML code like <center></center> to align images in exported HTML or PDF.
Also, by default, if a paragraph only contains one image, it will be center aligned. It uses following CSS:
/* for editing */
p .md-image:only-child {
    display: inline-block;
    width: 100%;
}

p > .md-image:only-child:not(.md-img-error) img {
    display: block;
    margin: auto;
}

/* for exporting */
p > img:only-child {
    display: block;
    margin: auto;
}
If you don’t want to center align images, you can add following custom CSS:
p .md-image:only-child{
    width: auto;
    text-align: inherit;
}

p > .md-image:only-child:not(.md-img-error) img {
    display: inline-block;
}
Resize images
For details, please see this link.